Showing posts with label Mass Battles. Show all posts

Saturday, 31 May 2025

Pynda 168 BC- Part 2- The Battle

In 168 BC, the Battle of Pydna marked a pivotal moment in the Roman Republic's conflict with the formidable Kingdom of Macedon. In a previous blog, I explained the preparation, research, and several potential 'What Ifs. The one played in this simulation was where the terrain favoured the Phalanx, with less broken ground.

The Historical Battle 

Had the following phases.


  • Skirmish triggers deployment
  • Initial clash - Phalanx gains advantage on flat ground
  • Terrain disruption - As Phalanx pushes the Romans back, their formation gets disrupted.
  • Roman exploitation - Manipular flexibility exploits gaps
  • Macedonian collapse - Battle line collapses
  • Rout


My Simulation

The Reluctant Advance

As the first light of dawn broke over the battlefield, two foraging parties clashed near the dry river bed. A brief skirmish ensued, during which the Roman light infantry was victorious, causing their Macedonian opponents to retreat in rout. This initial success would cause Aemilius Paulus a problem because the light infantry started to loot the bodies of their victims rather than retire to safety.


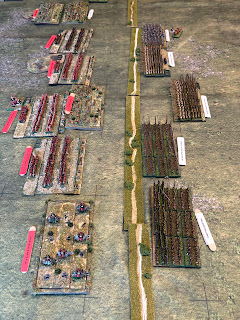
Whilst the skirmishes were fought, the two armies took cautious steps forward to support their companions. King Perseus of Macedon felt a heavy burden of uncertainty weigh upon him, causing him to hesitate. This reluctance fragmented his formation, with the Phalanx's left and centre surging ahead, leaving him and the right wing lagging behind. Seizing the moment, Aemilius Paulus moved his Legion forward, supported by the elephants on their right.


The Phalanx and Legions Advance

The Phanlanx and the Legions Advance

A Battle of Attrition

As the Phalanx rolled forward like a tide, Perseus finally regained control over his battleline, guiding them across the dry streambed in a solid line. Meanwhile, Aemilius Paulus faced significant setbacks. His advance was stifled by the remnants of the victorious light infantry, who seemed utterly absorbed in looting the fallen Macedonian soldiers rather than providing vital support to their comrades.
On the Roman right flank, colossal war elephants struggled against the uneven ground, their lumbering frames hindering the cohesion of Paullus' force and splintering any chance of an effective attack. In the ensuing chaos, Roman cavalry engaged in fierce skirmishes, pushing the Thracians back but inadvertently distancing themselves from the main body of their army. The Roman line had started to fragment.

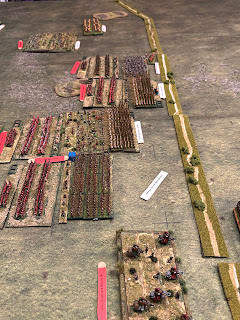
The Legions are Pushed Backwards
The Phalanx pushes the Legion backwards. In the Middle of the line, the Roman Light Infantry 
Remained trapped between the two masses.


Impetuous Cavalry?

In a mirror image of the Roman troubles, the Macedonian right flank saw Perseus' heavy cavalry chase off the Numidians, only to find themselves unable to rein in the wild pursuit, creating a precarious imbalance as zeal surged within their ranks.

Collision of Forces

The moment of reckoning arrived with a visceral clash; the two armies collided. The disciplined Macedonian Phalanx drove forward, initially gaining the upper hand and forcing the Roman legions uphill onto the rocky, unforgiving terrain. Yet the Roman velites proved to be an insufferable thorn in the side of their advance, thwarting their every move and creating chaotic gaps in the Macedonian centre.
Perseus found himself grappling with a dual challenge as his victorious cavalry struggled to regain control, unable to shift their focus back to launch an attack on the Roman left flank and rear, while the battle line fragmented, leaving the Macedonians more vulnerable than the Romans to exploitation.


The Turning Point

As the sun began to dip low in the sky, the tide of Battle seemed to sway precariously. The Galician mercenaries, once a bulwark for the Macedonian side, turned tail under pressure from the relentless Ligurians, further unravelling the Macedonian lines. The momentum shifted as the Roman forces finally orchestrated their regrouping, turning the tide against the Macedonian onslaught, albeit with their cavalry still isolated from the main action.
The heart of the battlefield, the decisive ground where fate would be determined, pulsated with tension as both sides prepared for what could prove to be the calamitous conclusion to this struggle.


The Final Push

In a dramatic turn of events that seemed ripped from the pages of Hollywood, the Macedonian cavalry commander brought his men's battle lust under control and managed to re-enter the fray, charging fiercely into the flank of Paullus' Legion. Recognising the urgency of the moment, Paullus committed his triarii to the Battle, and while the Roman Legion held firm, they became disordered under the double Macedonian assault.
Now victory appeared to hang tantalisingly within Perseus' grasp, he called out "Homunculus Est," urging his troops to claim victory. Success, the might of the Republic had broken.


A Close Call

History would remember Perseus' victory as a close escape. Had the Romans made the call at the end of the previous turn, they would have seized a stunning triumph. Overall, the Battle was a hard-fought contest, where both sides emerged battered but unbroken. Unlike the historical engagement, the 3rd Macedonian War would not end in a Pynda. Rome would seek revenge, while Perseus might have released the purse strings to purchase more mercenaries.

The Final Moves. The Cavalry Returns
The Final Moves. The fighting has broken into clumps, but at the top of the picture,
the Macedonian Cavalry has turned to attack the Roman Flank

Some Thoughts

Despite the outcome, the Battle followed the historical sequence of events closely. Besides some bad dice throws, the omens favoured Macedon. 
  1. The Roman light infantry's early success was a curse to Paulus. A series of poor dice rolls meant they hindered the Legion's advance. In the end, Paulus sacrificed them so he could get his legions into action, although the delay was probably costly. The opening light infantry should occur on one of the flanks rather than the centre of the battlefield. 
  2. The Macedonian cavalry played a more prominent role, fulfilling its intended purpose in Successor armies. In the historical Battle, they are invisible, and the sources do not answer why they did not play a prominent part.
  3. Last, the reduction in broken ground allowed Perseus to keep the Phalanx together, even when pushbacks fragmented the line. The fewer gaps were never sufficient to permit the Romans to exploit their flexibility. 

Thursday, 31 October 2024

Hedgeley Moor 25 April 1464

After the bloody victory at Towton (1461), England entered a relative period of peace and stability, although Lancastrian uprisings occurred in various parts of the country. Edward IV ordered Montagu to go north, contact the Scottish envoys, and eliminate dissident elements. As Montagu escorted the Scottish envoys back, he found his path blocked by a Lancastrian army at Hedgeley Moor, led by the old war horse, the Duke of Somerset.

War of Roses Battle from a Manuscript


The Historical Battle

Little is known of this small battle beyond the list of the participants, and one of the Lancastrian commanders, Roos, withdrew from the field. Different authors' reconstructions show different armies' compositions with varied interpretations of the terrain. However, the battle was fought on low undulating ground, with the flanks protected by boggy ground and lightly wooded or rough ground. This flanking terrain played no part in the following battle, so Hedgeley Moor was essentially a battle on a flat, open area.

Typically, the armies were organised into three wards or battles for this period. Each commander attacked their opposing ward before supporting their comrades. In the historical battle, the Lancastrian commander, Roos, retired before Scrope’s advancing battle. This allowed the Yorkists to turn on Somerset's Centre, which broke under pressure. On the Lancastrian right, Percy, the local man, fought on and was finally surrounded and killed.

The Rules

The War of the Roses period is rich with dedicated rules. Several generic ancient and medieval rules can be added to these. For this battle, I chose Test of Resolve, which I had previously play-tested in the skirmish at Clyst Heath, where only one ward aside was involved. The rules attempt to stimulate the tactics of the period and the battle itself. This means that the overall commander had little control of the events once the battle had commenced, so do expect to be able to practice complex flanking manoeuvres. It is a hack-and-slay conflict, which was reflective of the period.

The Simulation

The deployment was based on Test of Resolve Scenarios 1464-1487. Wo-Fun flats represented the two armies.

The Problem of Roos

Both sides were influenced by Roos's questionable loyalty. The Yorkist decided to hold back Scrope's ward so the potential event card would come into play that would test Roos' commitment.  Conversely, Somerset decided to test the opposing Roo's resolve and ordered an advance across the battlefront. Despite the orders from the Lancasterian commander, Roos moved cautiously into battle, with Somerset and Percy rushing to engage the enemy. 

An exchange of missile fire occurred as the two armies narrowed the gap, but this was largely ineffectual. The cards gave the Lancasterians the initiative, and Somerset, in the centre, first drew blood as he attacked Montagu's command. 

First Blood

First Blood. Montagu and Somerset Battles clash in the centre of the battle line.

Whilst the cards fell for the Red Rose, the Yorkist had the better of the melee dice. After the first wave of combat, Somerset's command nearly collapsed as two companies were forced to retire. Similarly, on Percy's flank, he and Exeter traded blows, with the latter gaining the advantage.

Treachery?

Seeing Somerset collapse, Roos decided it was not worth fighting a loss cause. The event card had finally come into play, and the resulting 'Show Your Colour Test' led to the dispersal of the Roos' command. This allowed Scrope to turn into the centre and threaten Somerset, but Scope's manoeuvre was painfully slow. In the meantime, Somerset and Percy had managed to rally his men and inflict damage on the Yorkist. Everyone was now close to breaking.

Late but Effective

Finally, Scrope engaged Somerset's flank, held by some archer units that immediately fled. Somerset failed the Battle Morale Test and was dispersed. Percy, as in the actual battle, was left to fight alone. However, the Yorkist failed to surround him, and the brave local lad managed to escape with the remains of his command.

Scrope finally approaches Someset's Flank. In the distance, Percy's forces can be seen slowly getting the better of Exeter's battle.

Thoughts

The battle played out very closely to the known events of the historical battle. Although the fight in the centre and on the Lancasterian right wing was close, the outcome could have been different if Scrope had delayed one more turn.

The rules provide a simulation of the warfare of the period. The critical incident was the event card that led to Roos' removal from the battlefield, mainly due to luck. First on, when it was drawn from the deck, and then the subsequent dice throw to see how the baron acted. Yet, this is how warfare was in the Middle Ages, with the commanders having little control of events once the lines attacked. For people who want to show their chess-like abilities on the wargames table, these rules are probably not for you. If you wish to experience all the frustrations of medieval command or lack it, these are enjoyable, simple rules that allow a good simulation of fifteenth-century warfare.

Wednesday, 29 May 2024

Clyst Heath - 1455


The battle of Clyst Heath occurred on 15 December 1455 near Exeter. Although the battle was part of the wider conflict known as the War of Roses, a personal feud between the Courtneys and their regional rivals, the Bornvilles, was the leading cause. This scenario comes from the third volume of the Test of Resolve scenario books. It is an ideal learning scenario because it only involves a single battle; most battles in this period involved three. Also, the scenarios did not have special rules. 

Battle of Barnet


Test of Resolve 

These rules were first published in 2021, and like many of my rule purchases, they have sat on my bookshelf. I have always fancied playing the rules dedicated to the War of the Roses. While this is not the place for a full review, please check out this YouTube video for more information. 
However, it is worth stating what drew me to them. They are part of a new genre in Wargaming where the rules are written for a narrow historical period, in this instance, 1455-97, allowing them to reflect more acutely late fifteenth-century warfare.
Second, the rules use a card activation system and a single d12 for most tests. This might seem to make the game too random, but this potential randomness is attractive for a solo player. 

WoFun Perspex Flats

The painting requirement became a barrier to playing during this period. Experiments with various scales ended up nowhere. I did not have the time to invest in something I remained uncertain about. I needed a cheap and quick method to put a good-looking game on the table. Enter WoFun Perspex Flats. These are designed and painted by Peter Denis. These miniatures can be simply slotted in a base, and they are ready to play. However, I took the option of edging the Perspex halo to provide a 3D look and flocked the bases. 

Bornville's Archers in their Blue Livery


Wo-Fun Flats in a melee


The Battle

Courtney opened with the initiative, but mistakes in his deployments led to chaos amongst his men (the first card drawn was flummoxed). Bornville used the confusion to move his army forward. However, Courtney’s red archers took first blood, leading to some of Bornville's archers fleeing the field.

Despite losing some archers, Bornville still had the initiative and launched an attack against Courtney’s longbow with mixed results. The archers soon dispersed, and the main retinues finally clashed. The Earl’s men held the initial assault, and one case pushed Bornville's retinues back. Now, the battle swung in Courtney’s favour as his superior number, despite the poor quality of some of his men, counted. Bornville found that his right flank had been turned, and his army started to bleed Battle Moral points.

The fighting continued for a few more cards, but it was now evident that Courtney would hold the field at the end of the day.


Comments 

I need to play this game again with three total battles aside because this will increase the commanders' choices. The cards tended to rule in this game, although I learned the importance of focusing resources and isolating the enemy. This is true for the period, but I am not an expert in fifteenth-century warfare.
Labels would be required to identify the units in larger battles, and I think they would add to the overall experience. 
Overall, it was an enjoyable game, and I cannot wait to try out a typical battle. Next on the table is Hedgeley Moor.


Tuesday, 23 April 2024

Aquae Sextiae 102BC

I have started two major Strength and Honour projects this year: converting my 6mm Romans and Successor armies to 120mm bases and secondly, working on amendments stretching the rules into the High Medieval era. Both will be a few month's work, so in the meantime, I am playing Marius’ campaign against the Germans in the Cimbrian Wars 113-101 BC. The first battle to hit the table was Aquae Sextiae 102 BC.

Marius


If you are interested in Marius’s wars against the Northern Tribes and the military reforms of this period, a good starting point is Ospreys’ The Cimbrian Wars by Nic Fields.  

Aquae Sextiae 102 BC.

Mark Backhouse wrote an article on this battle in Wargames Soldiers & Strategy (119). In Mark’s suggested reconstruction, the battle against the Teutones and Ambrones tribes was fought in two separate engagements. The first was a skirmish near a local stream, and the second occurred a day later when the main armies clashed.

The First Action.

This action involved some skirmishers on both sides. The Romans supported their water gathers with a couple of legions and cavalry. The latter, whilst they did not fight, had a major influence on the skirmish that followed. The Ambrones lacking mounted support became clumped together and never managed to neutralised the cavalry threat on their left flank.

The skirmishers exchanged missiles but with little impact. The Ligurians on the Roman right finally managed to move through the wooded area and threaten the Ambrones’ right flank. However, the superiority of the Roman legion plus the Germans' inability to manoeuvre, due to the treat of the Roman cavalry, led to several routs. Soon, the Ambrones were seeking the safety of their camp, so they could not fight another day.

Meanwhile, Marius now having the upper hand but did not want to call 'Homunculus Est' because he wanted to inflict maximum damage to weaken the force he knew he had to face the following day.

The Second Day

Two warbands had been routed during the river skirmish, and one was unavailable on the second day. Despite these losses, the Germanic host was impressive, amounting to ten warbands plus cavalry and skirmishers. 

The Romans followed Marius’s historical tactics of holding the hill and forcing the Germans to meet them on slightly unfavourable terms. I also used the ambush option mentioned by Plutarch, and one legion was also hidden in the wood on the Roman left flank. 

The German tactics I used needed to be more sophisticated. They aimed to attach through the centre, hoping to exploit Marius’ raw legion that he had placed as part of his centre formation. They also tried to outflank the Romans on their right, where the Germans, on the face of it, had a numerical advantage.  

The Armies Approach. Germans on the right at the Romans on there Left.

Opening Moves

The battle started with the Teutones and the Ambrones warbands rushing forward. The Northern tribes general knew it would be hard to keep his tribal formation as each warband would move at its maximum speed. Straight lines were not a German thing. The Romans stood their ground, although Marius tentatively moved the Ligurians forward towards a small wood supported by his cavalry.

Roman Left Wing - A Reappraisal 

The first clash was inconclusive, with equal honours, but the Teutones warbands soon threatened to envelop the Roman left, where their numbers became a major threat to Marius’ plan. For Marius, the battle soon boiled down to deciding when to trigger the ambush. The Roman left was outnumbered and under intense pressure, which caused the Romans to review their plans. Marius intended to wait until the warbands were fully committed before he unleashed the ambush. However, because of the Germans’ success on his left flank, he could not wait.

Ambush

The IV Legion was signalled to attack. At first, nothing seemed to move, and Marius feared the worst, then suddenly, the legion burst forth, hitting a Teutone warband in the flank. Luck followed Marius that day because, at their moment, the Roman cavalry gained an unexpected success on the right, and the German now found themselves with a successful flanking action on both their wings. The ‘Setback Cards’ were stacking up.

The Roman Attack Falters

Suddenly, the Germans rediscovered their fighting spirit and began to push back the legions in the centre. Marius’ raw legion suffered the worst in this counteroffensive, and Marius looked on in horror as the German veteran warriors moved closer and closer to the Roman camp. Meanwhile, the Roman success on the flanks faltered, thanks to a series of matched dice in several key melees. 

The Dam Bursts.

The German success in the end proved short-lived. In the next round of action, the legions re-found their momentum, and the flanks began to collapse as two warbands routed. Marius would not take any further risks; he had too many surprises that day. He called 'Homunculus Est'  , and the German Setback Cards, when counted, just equalled their breakpoints, and German's broke. It was a close call but victory was with the rising star of Rome

Comments 

After the double envelopment, I thought Rome had achieved its victory. All that remained was requiring enough Set Back and Disaster cards. In the end, this proved correct, but not before a couple of rounds of doubt when the Roam advance halted, and the German elite warband came within a move of the Roman camp. I love these little narrative twists that these rules produce..

Pushback 

The big learning element in this game was how to play the pushback rules when the attack came from the flank. Ultimately, I used common sense, and the pushback caused a ripple effect along the tribal frontline. I will have to do some rereading and ask some questions of the groups, but any flank attack soon proves lethal. I think this outcome is historical.

Warband Strategies?

The second question from this replay is, can I play a warband army more effectively? I find it hard to keep coherency with the maximum moved rule. Also, as warbands get support from a warband in the rear, the army tends to clump, leaving the flank open to exploitation. Therefore, the tactics I am using are unsophisticated. Either attack one element of the enemy line or a mass charge and quickly exploit any weakness that appears from this clash. More playtesting is required to develop some new ideas!

What Next?

Following his victory at Aquae Sexitae, Marius must face the Germans at Vercellae. I am also considering
playing one of these battles using To the Strongest to see how the rules differ in these historical encounters.
Monday, 18 September 2023

Cape Ortegal - The Replay


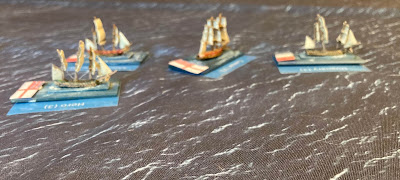
The setup for this game, including the ships involved, can be found here. This is my first major game in this genre, so apologies for the lack of nautical terminology.

The Wind in their Sails

British fleet started with the initiative, and Strachan decided to close the gap between the two fleets as rapidly as possible. With the wind in their sails, the British squadron made rapid pace towards the French fleet, although the Caesar at the fore of the British Line came under heavy fire and took substantial damage. 
Age of Sail


Unfortunately for Caesar, my novice interpretation of the partial broadside probably led to her sustaining more damage than necessary. However, be aware that these fighting gun platforms can absorb a lot before they begin to weaken.

Cutting the Line

However, as the British line approached, it swung to starboard at close range, and both fleets exchanged some devastating broadsides. After these exchanges, the honours were even. However, the British gained the first movement chit next turn, allowing them to cut the French line,  racking the Dugray and the Formidable. Both took heavy damage; the Dugray received a critical hit and lost her steering. Meanwhile, the Hero and Courage concentrated their fire on the Mont Blanc, which suffered heavy damage but remained actionable. After this divesting turn, the French fleet was in disarray. Dugray was sailing away from the action, and the Formidable's poor crew, an unlucky set-up throw, struggled to execute a turn to rejoin the Mont Blanc and the Scipion.

Cutting the Line


Dumanoir Strikes Back

By turn four, it looked like a British victory was assured, especially as the Namur had now come into the sight of the main action. However, the French were not defeated. A lucky broadside from the Formidable found its mark felling the Caesar's main sail, which collapsed onto the poop deck, injuring Strachen and the Caesars' senior officers. Strachan was forced to transfer the flag to Captain Gardner on the Hero.

This success against Caesar boosted French resolve, and the Formidable now managed to turn back onto the main action.  The plucky Scipion, which would prove to have the bravest crew on the day, continued to fight on regardless despite coming under heavy bombardment from the Hero and the Courageux. Finally, the two remaining French ships joined, enabling them to provide mutual support to each other.

The Weather Gods

Dumanoir le Pell now decided to isolate and destroy the Namur before she could join the main British squadron. Formidable and the Scipion sailed parallel to sandwich the Namur between their broadsides. However, the firepower of these ships had been diminished by the previous action, and minor damage was done. The Namur finally linked up with the Hero and the Courageux to form a new battle line that launched a vicious attack on the remaining French ships. The game has now turned into a series of fleeting exchanges as the ships passed between each other, and any kind of formation was now lost.

The advantage was now with the British, and it looked likely that the reenactment would create the historical outcome.  Again, when victory seemed inevitable, nature intervened. The wind turned more to the south, and on the next turn, the waters became choppy.  It appeared that the infamous lousy weather of the Bay of Biscay would have the last laugh because the conditions gave the French the chance to escape the clutches of the British warships. However, this proved to be a false hope. Another bombardment from the British ships forced the brave Scipion to strike its colours. Finally, the Namur and the Courageux caught up with the French flagship, forcing Admiral Dumanoir le Pelley to surrender.

The Final Moments


Some Thoughts

It was an enjoyable game with lots of twists and turns. As I am still learning the intricacies of KMH, mistakes were made, partial broadside and tacking being the two I spotted during the game. Also I think I will make two minor changes to the rules,
  1. A test  to break the line. It is, from my reading that this was a tricky manoeuvre.
  2. Introduce a call by the admiral to allow the ships to fight individually.  At what point in the game should you introduce ship cards/chits for individual ships and then squadron cards removed?   

Thursday, 14 September 2023

Battle of Cape Ortegal 1805.


This re-enactment is an early venture into Napoleonic naval warfare, using the Kiss Me Hardy (KMH) rules. My route to this battle and why I used the KMH rules can be found in my two previous blogs, Land Lubber and Age of Sail. This small battle is perfect for Kiss Me Hardy and solo play because of the few ships involved, although it can be played with two to four players. 

Age of Sail


Battle of Cape Ortegal, November 4th 1805

The Battle of Cape Ortegal, or Strachan's Action, was the final action of the Trafalgar campaign. It was fought between a squadron of the Royal Navy and a remnant of the fleet under Vice Admiral Dumanoir le Pelley that had escaped the Battle of Trafalgar. On 22 October, Dumanoir le Pelley sailed towards Rochefort. However, on entering the Bay of Biscay, he sighted the British frigate the Phoenix and gave chase. The Phoenix led Dumanoir’s to Starchan’s squadron. At this point, the commanders tried to gather their ships, although both suffered from slow-moving or damaged vessels. Strachan had to press on without the Bellona, and the Namur was probably foul-bottomed and was dragging behind the main line. For Dumanoir, most of his ships had sustained some damage at Trafalgar or in the following storms. The Scipion had difficulty keeping up with the main French formation and was harassed by the British frigates before the main action commenced.

The Battle 

The battle was reported in the Lloyds List on Tuesday, November 12 November,
The Formidable, of 80 guns, Dugay Trouin, Mont Blanc, Scipion, of 74 guns each, separated from the remains of the Combined Fleet. After the action of Cape Trafalgar, were taken the 4th Inst. of Rochefort, by the Squadron under the command of Sir Richard Strachan, consisting of The Caesar, Hero, Courageux, and Namur Men of War, Revolutionaire, Phoenix, Santa Margaritta, and Aoleus Frigates, after an Action of 3 hours and a half. The Enemy had 5 and 600 killed and wounded; our losses about 300 killed and 100 wounded. – The Caesar, Courageux, Hero and Revolutionaire arrived in Plymouth the 10th with prizes, which are all dismasted.

Refighting the Battle

Two options are available in setting up the game. 
  1. Ship of the Line Engagements. In most battles, the frigates played a limited role so that the battle could be played without the frigates. The skirmishing between the frigates and the Scipion can be built into the Scipion profile to reflect the damage the ship had sustained. The advantage of this approach is that there are fewer ships to handle for solo play.
  2. Including the Frigates. The British frigates played a part in Strachan’s plans. Besides harassing the Scipion, they would later swing around the rear of the French squadron, forming a secondary line.
The set-up below is for the first of these two option, without frigates.

Commanders and Organisation

The scenarios involve few squadrons, so it is unnecessary to detail the commanders' capabilities and skills. If you want to add this command element, the following is  If you want to add this command element the following is suggested, based on Nic Skinner’s, “I wish to amuse the fleet with a signal.”
Captain Sir Richard Strachan, ............ Intrepid Admiral
Rear Admiral Dumanoir le Pelley,.....  Patriotic
The French are organised as one squadron and the British into two groups. The main squadron and the Namur as a single ship command.

The Ships

I utilised Brian Weathersby’s “Messing Around with Boats” extension with some of the Fires as She Bears Trafalgar pack suggestions to model the ships for this action. All the British crew are classed as Jolly Jack Tars with their morale status being determined randomly.

The British Ships of the Line.

Name

Rate

Damage Points

Gun Dice

Speed

Notes

Caesar

Large 3

88

10

12

Flag Ship

Hero

3

70

9

12

Carronades

Courageux

3

74

9

12

French Prize ship.

Namur

3

70

9

11

Foul Bottomed


The French Fleet

Name

Rate

Damage Points

Gun Dice

Speed

Notes

Formidable

Large 3

95

9

12

Reduce damage Pts by 1d10+3 to reflect the damage taken at Trafalgar. Broadside reduced to 9 dice.

Mount Blanc

3

 82

 10

 12


Duguay Trouin

3

 82

 10

 12


Scipion

3

 82

 10

 12

But reduced by earlier frigate action. See below.


Notes on French Ships

All crew are Sans Cullottes with their with their morale status being determined randomly.

The Formidable
The Formidable was a large 80-gun third-rate, somewhat reduced in offensive capability due to damage taken during the Battle of Trafalgar. She had lost fifteen of her 12-pounders. This damage had been reflected in her Hull and Broadside ratings, by a dice roll and a reduced firepower.

Scipion
In this non-frigate scenario, the British may fire three unmodified broadsides, Long, Medium and Short, at Scipion prior to start of battle. This represents the duel between the British frigates Santa-Margarita and Phoenix prior to the main action. The three broadsides occurred an extreme, long, and close range. Critical damage caused by these broadsides is applied to the Scipion. If this option is used the British frigates play no part in the subsequent game.

Set Up

The action took place in November off the coast of Spain in the Bay of Biscay. A stretch of sea noted for its fiercest weather conditions. Therefore, the Wind Change and the Choppy Waters rules should be used.
The initial Wind direction given in Strachan’s report is in the south-east. Therefore, the British Ships have the Wind on the Quarter and the French Wind on the Bow. 

The British have the initiative, and the Sea Conditions were normal when the main action commenced.  

Deployment

The Namur

The Namur dragged some miles behind the British formation when the action commenced. To show this, the Namur will not appear before Turn 4. In this turn, throw 1d6

  1. Turn 4 if a 6 is thrown the Namur enters the table at the same point as the main squadron started the game and on the same heading.
  2. Turn 5 The Namur enters the game on 3, 4, 5, and 6, as described above.
  3. Turn 6 The Manor enters as described above.

On entering, add a Namur chit or card to the game sequence.

The Reenactment

The game that followed from this set-up can be found here.

Thursday, 10 August 2023

Phalanxes are Coming


A long-term project is to re-fight the struggles between Alexander the Great’s Successors, including Rome’s eventual conquest of the Greek East. Mark Backhouse is working on this supplement that will cover the early part of this period, but it’s not likely available until later this year. In the meantime, I thought getting experience handling a phalanx-based army would be helpful.


Chaeronea 86BC

The basic rules of Strength and Honour include one such engagement, Sulla’s victory over Mithridates’ army at Chaeronea 86BC. In this battle, the Pontic army led by Archelaus deployed four phalanx bases, forming the core Mithridatic force against Sulla’s five legions supported by their allies.

Like most ancient battles, very little is known of the order of battle, and the reports of the fight itself need to be clarified over the sequence of events. However, we have two primary sources. Appian and Plutarch provide a reasonable commentary on the battle., In addition, there are modern interpretations of Chaeronea in Philip Matyszak's book ‘Mithradates the Great’ and in Adrienne Mayor’s’.‘Poison King'.

The Phalanx


Reconstructing the BattleAs I wanted to test out the strengths and weaknesses of the phalanx army, I decided to re-fight the battle as close as possible to the original. Therefore, I changed the Strength and Honour scenario’s deployment. I moved the river from behind the Pontic forces to the Roman right flank, but it would have little on the battle itself.

Matyszak’s reconstruction

  1. The battle opens on his left flank; Murena, Sulla’s flank commander, attacked the Pontic right wing.
  2. The Pontic chariots charged the Roman legions in the centre of the Sulla line. The chariots' failure led to a general Roman advance.
  3. The phalanxes pinned the legion, a typical Hellenistic tactic, and the action moved to the wings.
  4. The Pontic sub-Commander, Taxiles, extended the left wing and tried to outflank the Romans. Murena's cavalry struggled now struggled against the superior numbers and required support from some unengaged cohorts and the cavalry on the Roman right led by Sulla himself.
  5. The movement of Sulla cavalry from the right led to the Pontic attacking the Roman right wing, forcing Sulla to return.
  6. Finally, the legions began to get the upper hand against the phalanxes, and the Pontic attack on the flanks disintegrated, and the wing commands crumbled. This led to the phalanxes being exposed, and the battle was lost.

My Reconstruction

My recreation followed roughly this series of events. The Roman attack on the left was initially successful but was pushed back by the Pontic counterattack. Meanwhile, the chariots proved as ineffectual as in the actual battle and quickly disappeared from the field. The legions now advanced but became pinned by the phalanxes.

Murena and the god of dice

In the reconstruction, the Pontic attack on the Roman left wings never had a significant impact, mainly because Murena’s cavalry had the god of dice riding with him. His success in combat was quickly followed up by some awful discipline test by the Pontic left wing, which promptly collapsed. Sulla's help was never required, and the Pontic attack against the Roman right failed to make any headway. The Pontic general was now using up his command board chits to hold some form of force on the left, but in the end, it routed.

Homunculus Eat

The phalanxes now found themselves pinned by the legions, and a series of inclusive melees occurred between them across the centre. Meanwhile, the Pontic left finally collapsed. Sulla called Homunculus Est, but unfortunately for him too early, by one point. However, the Pontic army was now fatigued and running out of command chits and options. The game was effectually won despite removing a five-card from the Pontic setback/disaster hand. The phalanxes, now isolated in the centre, became prey to the Roman flank forces.


Some Thoughts

Overall, another enjoyable battle, and it did follow the historical sequence of events as I could reconstruct them. For me, more phalanx practice is required. The phalanx is an excellent defensive unit, but I must learn to use them more aggressively. I need to know to time the use of the supporting cavalry better. Finally, next time I leave the chariots in the garage.

Anyway, until the supplement arrives, I plan to recreate some more of Mithradates’ battles.


Friday, 9 September 2022

Battle of Nidbodmar


The Purity Crusades

This battle report is the last part of my three campaigns that will be fought in the world of Telemar. The idea is that sometime in the future, the three strands will join to reveal the true villain behind these conflicts.

See, The Shadow Wars; The Ancestor War.

The Conclave of Caelthyr

Aenarion II, ‘The Pious’, Lord of the Hidden Light, High King of the Five Realms, 1087, summoned the Elven High Lords to a conclave at Caelthyr. Aenarion stood before the great and good of Elven Kin and preached a crusade against the Unbelievers. His speech would change the isolationist strategy the Elves had adopted for two centuries and launch a series of holy wars.

Kin and the Kindred.

Aenarion II’s first was the hated Kindred or Umbrians, a tribe of Elves that had broken away from the Hidden Light to walk a much darker path. The rivalries between the Kin and the Kindred had lasted centuries since the Wars of Division when the Elven path to enlightenment separated. Ever since those ancient days, both sides had raided the other land in search of plunder and as a coming-of-age ritual for the younger Elves. Therefore, it was easy to use one of these events for Aenarion to claim the moral high ground to launch a significant retaliatory ‘raid’ against the Kindred.


The First March of 1088


In late spring the following year, Aenarion’s army marched towards the river Nidmar, the boundary between the ‘lands of the sun and shadow’. However, despite the speed of Aenarion’s advance, the Kindred’s Triumvirate despatched one of its number, Mor ‘a Gul, the Lord of Beasts, to intercept the High Elves' advance. The two armies met where the Old Way crossed the river Nidmar, close to the now-ruined watchtower, Nidbodmar.

The Battlefield


The river Nidbod runs east to west across the battlefield and is spanned by a substantial stone bridge. Close to the bridge is an old watchtower, which is now in ruin and not ideally situated to guard the bridge; the river must have changed its course since the tower was last used. The Nidbod is fordable to the east and west but not within 18 inches of the bridge. Low hills feature on either side of the river, and small woods dot the landscape, incredibly close to the Old Road that runs north to south across the battlefield.


The Strategies


Aenarion concentrated his attack on the bridge, utilising his spearman supported by the deadly elf archer regiments. Enior, the mage, would also support this attack. The fords further up and down the Nidmar course created a problem because they would allow a possible outflanking movement. To counter this, Aenarion stationed smaller commands on the low hills, with orders to defend and protect his flanks. If they thought the attack was blunted, the commanders could counterattack to draw the Kindred away from the centre.

Mor a’ Gul decided to attack the right to turn the High Elf’s left. The centre, Mor a’ Gul, deployed sufficient forces to contest the bridge without committing too many resources. The aim was to buy time to allow him to defeat the enemy's right flank. On his left, he placed a small command composed of Dark Reavers and Saurian Riders. Their instructions were to make a nuisance of themselves, but if they hit strong resistance, to fall back across the river and defend.


The Armies Advance


Both armies were noted for their speed, but the striking opening moment was the Kindred’s War Hydra that rushed to devour Elven flesh. The Great Eagles seeing a creature that for them sickened the laws of nature, flew to intercept. However, the Nargutun knights intercept the eagle’s flight, and their long-necked lizard mounts make short work of the feathered host.

In the centre, things were going better for the High Elves. Here the elf spearman forced a passage across the bridge, despite coming under heavy fire from the Kindred’s crossbowman. Trying to protect the Kindred lives, the crossbowman withdrew, and the Slave Legion charged home. However, these enforced troops were no match for the Elf spearmen and were brutally dispatched.

In the meanwhile, on the flanks, the skirmishing continued. Both commanders had orders to probe the High Elf’s left flank, and a series of ongoing skirmishes broke out. However, on the other flank, the Nafgutun knights defeated the High Elf knights, and Aenarion’s left battle slowly had to disintegrate.


The Unstoppable Elf Phalanx


In the centre, Aenarion phalanx of spears continued to push up to the road. Combined with their inherent strength and fantastic dice rolls, they destroyed all comers. The road was soon clear of the kindred. However, the High Elf’s flanks continued to collapse as the superior Kindred number took its toll. On the right, the hastily recruited crusader elves and their knightly support routed. On High Elf's left flank, Mor ‘a Ghul was now only kept at bay by a thin line of elf archers supported by the light cavalry. The total collapse was a matter of time (one or two rounds). Aenarion started to withdraw. Mor ‘ Ghul suffered heavy losses and decided he could not threaten Aenarion’s retreat.


Aftermath


Overall the battle was a draw, although either side at one point could have achieved an outright victory. However, Mor ‘a Ghul held the battlefield and gained his triumph. Aenarion’s first battle of his Purity Crusade was not the success he wanted, but neither was it a disaster. Several frontier towers had been regarrisoned, including Nidbodmar. He now knew he needed the power of his regular forces rather than relying on some over-enthusiastic ‘crusading’ volunteers.


Tuesday, 8 June 2021

Battle of Landon Gate

This wargame is the first action of the Ancestors' Wars—a struggle between a High Medieval army and an undead warlord and his minions. It is the second strand of my Fantastic Battle campaign world.  I wanted to try a battle between two uneven armies in this scenario and based it on Charles Grant’s Programmed Scenarios, the 'Hasty Blocking Position'. The medieval army’s objective was to hold and occupy a pass until news arrived that the main army had assembled. The former had 750 points, and the attacking undead horde 1250 points.


Scenario Rules

The rules were kept the same, but I gave both armies three turns to deploy. After that, a further six rounds would be played, plus a random element. This was achieved by a simple roll of d6 with odds, improving one pip each turn. This represented a messenger arriving with the news that the main army had assembled and was on the march.


Background

What do you do when the pretender to the throne is your long-dead great, great uncle, Roboant the Damned? This was the problem that faced Tancred III Montduras when he heard of the uprising. His response was to call the kingdom to arms. However, this would take time. Therefore, on a windy spring morning, a messenger was dispatched to Gontier, Lord of Aire and Marshal of the Foremark. The king's instructions were simple, delay Roboant’s host by holding the Landdon Gate as long as possible.


The Strategies

Roboant strategy was to send the third of his army to harry Gontier's army as it tried to deploy in the Gate. The bulk of his host would push down the southern road and break through the pass as quickly as possible.

Gontier's approach was to secure the pass, using Ulf's mercenary Kerradian light horse (Zebra Riders) as a defensive shield to protect his deployment of the vulnerable infantry. Once the defensive lines had been established around Signal Hill, he would make intermittent forays to disrupt the advance.


The Battle Plan


The Forces Arrival

Dawn brought the howling of wolves with it, and as the morning mists lifted in the east, shadowy figures could be seen in the distance. A pack of fast-moving dire wolves sped down the valley. Meanwhile, Gontier had sent the mercenary Ulf and his Kerradian light horse to cover the deployment at the Landon Gate.


Deployment Issues

Both commanders needed help moving their armies whilst changing from column to line. Although frustrating, this was an exciting part of the battle. The commanders were forced to move up a down the marching columns to keep units in command. A halted unit quickly caused a roadblock bringing chaos. This was a significant disadvantage to the undead army because it was more extensive, and the mindless trait slowed it. Roboant would spend the whole battle flying up and down the line trying to get his zombies and skeletons into the action.


The Advance

The problems with deployment led to the advance guards fighting largely unsupported (turn 3). The wolves had moved quickly through the woods and down the road and charged Ulf's screening force (turn 4). The developed melees saw the wolves slaughtered, thanks to some appalling dice rolls that led to a surrounding victory for Ulf and his riders.


Ulf's Screaming Force


Roboant's Dilemma

Roboant's slow-moving reanimated horde took too long to march to the pass. Haste spells helped, but there was a need for more necromancers. It was a mistake only to include one additional magic user—a note to other potential undead commanders. Summons spells may look attractive, but haste is vital to get your undead army into battle. The impact was that Roboant human allies, the Doomed Ones and the Outcast, separated from the main command structures. For a few vital turns, the attack depended on the role of the Impetuous Actions table because the Undead commanders were too busy throwing haste spells at the slow-moving column.


Robot on Giant Bat Mount


Main Attack

Finally, Roboant was able to launch his main assault. The Doomed Ones and the Disinherited (Undead Knights), supported by the remnants of the dire wolves, attacked Gontier's main body of knights. West of the Gate, in the centre of the battlefield, Ulf attempted to rally his riders. Meanwhile, Gontier's knightly rear-guard tried to prevent Skeleton horsemen from attacking the rear of the infantry column.


The Gods

Nine turns had now been played, and the game moved on to its random element. Throughout the game, the dice favoured Gontier. However, now the gods' will seem to move against him, and the die roll allowing him to withdraw never occurred. The knights faltered despite the freshly rallied sergeants (light horse) support. The zombie hordes and the Outcast brigands had entered the neck of the Gate. Gontier joined the lines of the militia spearmen as the zombie hordes stumbled into charge range. Now it seemed time was against the living, and the undead would push into the heartlands of the kingdom before the army was assembled.

The Miracle of St Emidius 

As the zombies moved in for the kill, the men started to shout, and on the southern hilltop, witnesses claimed they could see a ghostly white figure mounted on a white horse. At this moment, the earth began to rumble and shake (a random event- Earth-shaker), and standing became an effort. The two lines froze in position, unable to move forward due to the moving ground. A few arrows were let loose, but with an unstable footing, they had little effect. No one can say how long the battle halted, but it created vital minutes for the living.

The Battle Ends

The fighting continued after the earth shook, but on the next turn, a messenger arrived, and Gontier started to full-back along the pass. Roboant halted his advance, unwilling to be lured into a potential ambush. Also, the sun was now high in the sky, which was not a particularly good time for an army that liked the shadows.


Enter the Leopard – Swashbuckling in the English Civil War

Meet Edward Clement, better known as the Leopard – spy, adventurer, diplomat… and perhaps a forgotten pretender to the English crown. He is ...