Showing posts with label Medieval. Show all posts

Sunday, 16 March 2025

Midgard - An Introduction.

Midgard: Heroic Battles was launched in November 2023. Written by James Morris (Mogsymakes) and published by the Too Fat Lardies’ Reisswitz Press, it is a historical fantasy game for the age of heroes. Like most Lardies games, it is designed for a fun gaming session rather than competitions and is centred on leadership. It immediately gained a following, the Facebook group 2.6k (February 2025) and was voted the best new game of 2024 by Wargames Illustrated.


I watched and participated in the game at several wargame shows, so I was captivated before its release. Aside from the appeal of the rules, I also had a pile of figures that could be used for the games, ranging from Trojan War to High Elves. Some resided in a pile of lead, while others only required rebasing.

The Rules


The Midgard rules are a sandbox rule set where a unit or hero's essential attributes, attack, armour stamina, etc., are modified by traits to provide greater depth. This mechanism is not new, Fantastic Battles uses the same process. The average game, about 300 points, will involve 10 to 12 units and 3-4 heroes. The typical unit in 28mm will be eight figures so the army in size is similar to the Lion Rampart family of games.

Reputation 

The morale of the army is measured by its reputation. Each army starts with a reputation score, but this fluctuates during the battle, mainly due to the heroes' actions. For example, a hero throwing himself into a charge will earn a reputation, while if a hero abandons a unit while in combat, the army will lose reputation points. As the battle intensifies, units will lose stamina, making them more difficult to command, and finally, they will rout with the loss of those valuable reputation points. This system means no figure removal, which makes conversion from other systems easy.

Basing and Spear Throws

The suggested basing is 120mm wide, with the base depth primarily left to the model's needs. Other widths can be adapted for smaller scales and to accommodate already-based models. However, the basing has to be consistent, and the width (120mm) is used for measuring movement and shooting distances; i.e. 'On Spear Throw (ST)' = 120mm or the width of the base. Therefore, if a small base size is adopted, the ST gets reduced.


Mighty Deeds

The core of the rules, and what makes it unique, is the impact of heroes, including gods, sorcerers, priests and holy men, on the battle. There are four levels of heroes, and the hero's level is linked to their ability to perform mighty deeds. Mighty deeds are spent to boost morale at times of need, increase the fighting prowess of the units or activate some unique ability. However, these gifts come at a cost, and the casualty rate amongst heroes is high compared to other games, especially as rival heroes are prone to issue challenges to single combat.


Scenarios and Army Lists

The rules come with five scenarios and twelve army lists, including Greeks and Trojans, Arthurian Romans and Saxons, Dwarfs and Elves, as well as the armies of Thor and Loki. A points system is available to create your own armies, and a fan-designed force builder helps in this process. There is no campaign system, but one is currently being played and tested, so hopefully, there will not be an extended wait.
One last comment on this brief introduction to Midgard is the production quality, artwork, and clarity of writing are the best I have seen. 

Battle of Fenley Lay


I have played Midgard at shows, but I used basic set-up for my first home battle. I opted for the first scenario, ‘The Battle,’ a head-to-head struggle across an open battlefield. I chose a classic fight between Vikings and Saxons—a simple infantry clash with no magic or monstrosities. 

The Viking hero opened the fight by challenging any Saxon champion to face him in single combat. An offer the Saxons, who had planned a defensive strategy, refused with the resulting loss in reputation. The first phase of the battle was all about the Vikings. Moving quickly forward, they charged the Saxon line. Consequently, the Viking reputation grew rapidly as the Saxons began to struggle. 
The battle now became one of push-and-pull between the two shield walls. The Vikings had the advantage of better troops, while the Saxons' greater numbers allowed them to fight in depth while trying to put pressure on the Vikings’ right flank.

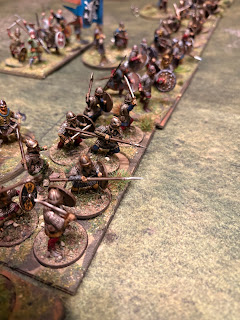
Battle of Fenley Lay - The Saxon ShieldwallBattle of Fenley Lay - Viking Shieldwall
The Saxon (Right) and the Viking (Left) shieldwall at the Battle of Fenley Lay

The shieldwall fractured several places as the battle progressed, and the field was now littered with individual combats. The reputation of both sides began to leak away, and stamina and men were lost. Finally, the Saxon flanks attack began to gain some success against the more vulnerable Bondi, who started to flee the battlefield, and the Vikings lost their last reputation point. The ended with the Viking leader, Ivar the Boneless, still standing proud amongst his hirdmen, surrounded by a pile of Saxon bodies, although the day was lost for him.

Battle of Blood Ford


In my second test game, I introduced some terrain. The most important feature was a river running the table length with a wide Ford in its centre. To the flanks were some woods and broken ground. With their superior troops, this narrow frontage should favour the Vikings, but the Saxons had stolen a march of their enemies and were closer to the river and its Ford. So, the Saxons made a rapid advance to control the Ford. After an inconclusive duel between Ubba and the Saxon, Oswald of Theadford, the Saxons rushed across the river, hitting the Viking shieldwall and pushing it back along its length.
However, the Saxon joy was short-lived. While the Saxons continued to win in the centre, the flanks started to full back under Viking pressure.

Saxon Charge Across ther Ford
The Initial Saxon Surge Across the Ford.

The battle swayed back and forth across the river, and the shield wall fractured into several smaller melees. As the Viking warband made ground on the flanks. Ubba was out for revenge following his earlier inconclusive duel. His household warriors cut through the Saxon left, leading their leader XX to be the fodder for the crows and the wolves.  Alfheah, the Saxon commander, and his warband broke through the centres, leaving a mass of bodies that they left in their wake, which included the Viking leader, Ivar the Boneless. The Alfhead's victorious Saxon attacked the Viking left flank, which collapsed as the raiders decided they had enough. A rare victory, if bloody, for the Saxons.


Some Closing Thoughts.


The game is excellent; it looks good, and I felt it captures the look and feel of the conflicts of the Early Middle Ages. Strategy is rudimentary due to the era's limited command and control capabilities. However, the game is designed as a sandbox game, so it can be adapted for many historical and fantasy genres. Lists, for example, are available for the War of the Roses. I have also seen debates on its unsuitability for the Italian Wars at the end of the fifteenth century. It is best not to approach Midgard in purely linear terms. Midgard is best suited when men led their own band of followers before the rise of the national state. Technologically, when gunpowder becomes a dominant force, and the opportunities for historic deeds are diminished, it also acts as a limiter. Therefore, while the rules may lose their ‘feel’ from the fifteenth century in Europe, they could be used for the Sengoku period in sixteenth-century Japan. 

Midgard also looks great on the table, so it's game to get those banners and standards out as they lead units and cluster around the army's heroes. I plan to try the rules with some 10mm armies, so I hope Midgard's appeal continues. 

Last, what is Midgard’s USP (Unique Selling Point)? Several fantastic sandbox systems are in the market, including Fantastic Battles, Lion/Dragon Rampart, and the DBA family. All have appeal, but Midgard places the heroes in the centre of the action, but here are no superheroes in these games; heroes will die. However, it’s through them that the game narrative is created, and in my opinion, what makes Midgard unique.

For me, the next stop is introducing some magic and the massive creatures of myth and legend and resurrecting my pile of lead and plastics to get more Midgard armies on the table. 


Thursday, 31 October 2024

Hedgeley Moor 25 April 1464

After the bloody victory at Towton (1461), England entered a relative period of peace and stability, although Lancastrian uprisings occurred in various parts of the country. Edward IV ordered Montagu to go north, contact the Scottish envoys, and eliminate dissident elements. As Montagu escorted the Scottish envoys back, he found his path blocked by a Lancastrian army at Hedgeley Moor, led by the old war horse, the Duke of Somerset.

War of Roses Battle from a Manuscript


The Historical Battle

Little is known of this small battle beyond the list of the participants, and one of the Lancastrian commanders, Roos, withdrew from the field. Different authors' reconstructions show different armies' compositions with varied interpretations of the terrain. However, the battle was fought on low undulating ground, with the flanks protected by boggy ground and lightly wooded or rough ground. This flanking terrain played no part in the following battle, so Hedgeley Moor was essentially a battle on a flat, open area.

Typically, the armies were organised into three wards or battles for this period. Each commander attacked their opposing ward before supporting their comrades. In the historical battle, the Lancastrian commander, Roos, retired before Scrope’s advancing battle. This allowed the Yorkists to turn on Somerset's Centre, which broke under pressure. On the Lancastrian right, Percy, the local man, fought on and was finally surrounded and killed.

The Rules

The War of the Roses period is rich with dedicated rules. Several generic ancient and medieval rules can be added to these. For this battle, I chose Test of Resolve, which I had previously play-tested in the skirmish at Clyst Heath, where only one ward aside was involved. The rules attempt to stimulate the tactics of the period and the battle itself. This means that the overall commander had little control of the events once the battle had commenced, so do expect to be able to practice complex flanking manoeuvres. It is a hack-and-slay conflict, which was reflective of the period.

The Simulation

The deployment was based on Test of Resolve Scenarios 1464-1487. Wo-Fun flats represented the two armies.

The Problem of Roos

Both sides were influenced by Roos's questionable loyalty. The Yorkist decided to hold back Scrope's ward so the potential event card would come into play that would test Roos' commitment.  Conversely, Somerset decided to test the opposing Roo's resolve and ordered an advance across the battlefront. Despite the orders from the Lancasterian commander, Roos moved cautiously into battle, with Somerset and Percy rushing to engage the enemy. 

An exchange of missile fire occurred as the two armies narrowed the gap, but this was largely ineffectual. The cards gave the Lancasterians the initiative, and Somerset, in the centre, first drew blood as he attacked Montagu's command. 

First Blood

First Blood. Montagu and Somerset Battles clash in the centre of the battle line.

Whilst the cards fell for the Red Rose, the Yorkist had the better of the melee dice. After the first wave of combat, Somerset's command nearly collapsed as two companies were forced to retire. Similarly, on Percy's flank, he and Exeter traded blows, with the latter gaining the advantage.

Treachery?

Seeing Somerset collapse, Roos decided it was not worth fighting a loss cause. The event card had finally come into play, and the resulting 'Show Your Colour Test' led to the dispersal of the Roos' command. This allowed Scrope to turn into the centre and threaten Somerset, but Scope's manoeuvre was painfully slow. In the meantime, Somerset and Percy had managed to rally his men and inflict damage on the Yorkist. Everyone was now close to breaking.

Late but Effective

Finally, Scrope engaged Somerset's flank, held by some archer units that immediately fled. Somerset failed the Battle Morale Test and was dispersed. Percy, as in the actual battle, was left to fight alone. However, the Yorkist failed to surround him, and the brave local lad managed to escape with the remains of his command.

Scrope finally approaches Someset's Flank. In the distance, Percy's forces can be seen slowly getting the better of Exeter's battle.

Thoughts

The battle played out very closely to the known events of the historical battle. Although the fight in the centre and on the Lancasterian right wing was close, the outcome could have been different if Scrope had delayed one more turn.

The rules provide a simulation of the warfare of the period. The critical incident was the event card that led to Roos' removal from the battlefield, mainly due to luck. First on, when it was drawn from the deck, and then the subsequent dice throw to see how the baron acted. Yet, this is how warfare was in the Middle Ages, with the commanders having little control of events once the lines attacked. For people who want to show their chess-like abilities on the wargames table, these rules are probably not for you. If you wish to experience all the frustrations of medieval command or lack it, these are enjoyable, simple rules that allow a good simulation of fifteenth-century warfare.

Wednesday, 29 May 2024

Clyst Heath - 1455


The battle of Clyst Heath occurred on 15 December 1455 near Exeter. Although the battle was part of the wider conflict known as the War of Roses, a personal feud between the Courtneys and their regional rivals, the Bornvilles, was the leading cause. This scenario comes from the third volume of the Test of Resolve scenario books. It is an ideal learning scenario because it only involves a single battle; most battles in this period involved three. Also, the scenarios did not have special rules. 

Battle of Barnet


Test of Resolve 

These rules were first published in 2021, and like many of my rule purchases, they have sat on my bookshelf. I have always fancied playing the rules dedicated to the War of the Roses. While this is not the place for a full review, please check out this YouTube video for more information. 
However, it is worth stating what drew me to them. They are part of a new genre in Wargaming where the rules are written for a narrow historical period, in this instance, 1455-97, allowing them to reflect more acutely late fifteenth-century warfare.
Second, the rules use a card activation system and a single d12 for most tests. This might seem to make the game too random, but this potential randomness is attractive for a solo player. 

WoFun Perspex Flats

The painting requirement became a barrier to playing during this period. Experiments with various scales ended up nowhere. I did not have the time to invest in something I remained uncertain about. I needed a cheap and quick method to put a good-looking game on the table. Enter WoFun Perspex Flats. These are designed and painted by Peter Denis. These miniatures can be simply slotted in a base, and they are ready to play. However, I took the option of edging the Perspex halo to provide a 3D look and flocked the bases. 

Bornville's Archers in their Blue Livery


Wo-Fun Flats in a melee


The Battle

Courtney opened with the initiative, but mistakes in his deployments led to chaos amongst his men (the first card drawn was flummoxed). Bornville used the confusion to move his army forward. However, Courtney’s red archers took first blood, leading to some of Bornville's archers fleeing the field.

Despite losing some archers, Bornville still had the initiative and launched an attack against Courtney’s longbow with mixed results. The archers soon dispersed, and the main retinues finally clashed. The Earl’s men held the initial assault, and one case pushed Bornville's retinues back. Now, the battle swung in Courtney’s favour as his superior number, despite the poor quality of some of his men, counted. Bornville found that his right flank had been turned, and his army started to bleed Battle Moral points.

The fighting continued for a few more cards, but it was now evident that Courtney would hold the field at the end of the day.


Comments 

I need to play this game again with three total battles aside because this will increase the commanders' choices. The cards tended to rule in this game, although I learned the importance of focusing resources and isolating the enemy. This is true for the period, but I am not an expert in fifteenth-century warfare.
Labels would be required to identify the units in larger battles, and I think they would add to the overall experience. 
Overall, it was an enjoyable game, and I cannot wait to try out a typical battle. Next on the table is Hedgeley Moor.


Tuesday, 21 May 2024

The Saga of Harold Halfdan & Oswulf Donothing


The Saga rules with several of its extensions have set on my bookshelf, so I thought it was time to try the rules. It is a popular rule set, widely played and used in many tournaments. My ‘learning game’ was very simple,
  • I used two of the easier factions that matched my miniature collection, Vikings and Anglo-Danes.
  • Four point armies, generally organised in the basic formations. The exception was the Viking herdsmen, who I merged a single unit.
  • No objectives were used. I followed the set up procedure in 'Clash of Warlords' chapter. This led to a hill being placed close to the Viking deployment area and a wood that protected the Saxon's left flank.

Tactics and Deployment


Harold tactics were his favoured, and had brought him many victories - charge! Therefore, he combined his Hirdman and placed them in the centre of his line with a unit of warriors on each flank. The warriors on the left were deployed a greater distance from the main force, so they could defend the flat ground. The plan was simple, take the hill and use it to launch an attack at the Saxon lines.

Oswulf adopted a cautious approach. He placed his levy archers on his left where they were protected by the wood on their right the Fyrd (warriors). Next a unit of Huscarls completed the main force. Oswald and another unit of Husacarls took their positions on the far right, with the aim of turning the Viking's flank.

The map below provides an overview. 


The Battle


Harold Hirdman opened the battle by charging the Saxon Huscarls who the Vikings slaughtered. However the warriors (Bondi) proved less successful against the Saxon warriors and were repulsed with heavy losses.  Harold ordered his Hirdman to attack the stubborn Fyrd but they too were repulsed. Even when he joined the battle the Saxons remained stout in their defence. 

Meanwhile, Oswulf had advanced within charging distance of the viking Bondi whom Harold had held back to buy time for his main attack to be successful. The Huscarls charged and pushed the Viking warriors back but they held their line. So far the great Saxon thegn had been a footnote to the battle and this is how it would end. Whilst Oswulf struggled his main force had overcome Harold and his men fled back to the hill top for safety. It was the day of the warriors rather than glamour seeking elites.

The Mead Hall at Saxmundum would sing of the great victory of Oswulf Donothing.

The Viking Host


Some Comments

This was my fist game of Saga and I enjoyed it. The game is more fantasy than historical, it is the 'Dark Ages' according to the sagas or Hollywood rather than a historical stimulation. Next I plan to play a full 6 point army and try Age of Magic. I also want to build in some solo options.

I will write a fuller review later and make some comparisons to other skirmish games. However, in the meantime a couple of enjoyable hours where you spent playing the game rather than having your head in the rules. 

Sunday, 18 February 2024

Strength, Honour and Chivalry


New year and a new project. I will try adapting Strength and Honour to the High Middle Ages, c. 1050-1250. I have read on the Facebook group that there is an adaption for the Late Middle Ages, but the Medieval period was a long one, about 1000 years. During this time, armour, tactics and the ethos of war changed.

Workbench Photo


Few Changes 


My starting point is that warfare in the High Middle Ages differed from warfare in the early Roman Empire, the period covered by the core rules. However, many mechanisms and troop types could easily be translated to the medieval period. However, differences do exist.

The Main Differences 


The Size of the Armies. 

Numbers are a problem for medieval chroniclers, but the overall impression is the armies were in the low 1,000s. Battles like Hastings and Hattin were the exception. This means that the base will represent a lot fewer men. An infantry base of between 1,000 and 2,000 men is my starting point. This means the battlefields are smaller, which will impact the mechanics, for example, command ranges.

Leadership. 

In Western armies, leadership had a heroic quality. The commander was usually attached to his retinue and led from the front. More Alexander than Julius Caesar. Muslim, Byzantine generals had a more classical approach to the general positioning. This will impact the Command Board and the risks to the general in combat.

Deployment. 

Honour and status had an impact on deployment. The vanguard and the rearguard were positions of honour.

Pre-Battle Sequence. 

Battles were rare. Most generals adopted a battle avoidance strategy. This makes the pre-battle manoeuvring more important. I am currently looking at adapting the Mortem et Gloriam system, which covers this aspect well with a simple set of rules.

Religion & Faith. 

What is the impact of religion - relics for auguries? It may be necessary to have a priest troop type.

Initial Scope

My initial area of concentration is the Crusades from the 1st to the 3rd Crusade because the variety of fighting cultures involved will be a good mechanics test. The main tactical styles will include the Western, knight-based armies with emerging chivalric way of war. Eastern military culture; the Muslims (sedentary, Fatimids and the Turkic ruled Damascus, etc) and Byzantine. These armies were influenced by the tactical doctrines of the Roman and Sassanid empires. Last, the culture of the steppe nomads, wild Turks and Mongols. 

The Battles Covered

The starting point is to get the scale per base correct. This will involve looking at about a dozen battles to ascertain the best scale to get 6-14 elements per side on the battlefield, but it also produces a balanced game.  The current list is; Antioch (1098), Ascalon (1099), Harran (1104), Ramla (1105), Tell Danish (1115), Field of Blood (1119), Ibelin (1123), Inab (1149), Harrim (1164),  al-Babayn (1167), Mont Gisard (1177), Hattin (1187), Acre (1190), Arsuf (1191), Gaza (1239), La Forbie (1244) and Mansurah (1250).
Not all these battles will make the cut, and the several battles fought during the siege of Acre could be turned into a mini-campaign.


Sunday, 10 December 2023

Feud III - Treachery at Castle Awre


Two months after the Battle of Didbrook, Gilbert of Claire, revelling in his triumph, persisted in raiding his rival Engelard de Cigogné's territories. The climax of this confrontation emerged in early September, as Gilbert successfully cornered Engelard within the walls of Awre Castle.

Castle Awre's Defensive Dilemma


Facing numerous challenges, the defenders of Awre Castle were at a disadvantage. Dilapidated walls, meagre maintenance, and insufficient supplies marked the castle's ill-prepared state. The only glimmer of hope rested on the unpredictable weather, potentially compelling Gilbert to lift the siege. However, an unexpected Indian summer dashed those hopes, propelling Engelard into a daring raid on Gilbert's camp.

Engelard's Bold Gambit


In a desperate bid to break the siege and humiliate Gilbert, Engelard orchestrated a last-ditch raid on his adversary's camp. The mission was to relieve the siege and set Gilbert's tent ablaze, housing his precious treasury.

The Tactical Dance Unfolds


Engelard and his forces charged forward despite initial hesitation, supported by household sergeants and Welsh mercenaries. Breaking through the camp's outer defences, they encountered resistance from Gilbert's spearmen. A countercharge from Gilbert's sergeants stalled Engelard's advance, buying crucial time for organising the defences.
Engelard Attacks Gilbert de Clare's camp


Gilbert's Tactical Brilliance


In a display of strategic acumen, Gilbert seized the opportunity to attack Engelard's flank, decimating the Welsh mercenaries and exposing the knights to a vulnerable flank.
Gilbert Gathers his Knights

Welsh try to resist Gilbert's Charge


Shadows of Treachery


As the battle teetered on the brink, whispers of treachery surfaced. Under local levy command, the castle militia refused to support their lord. Speculation arose – had the de Clares bribed them? Though evidence was scarce, the castle castellan, Roger of Trowbridge, retained his position when Engelard de Cigogné was forced to abandon the castle, facing the aftermath of his failed raid.

The Aftermath


Gilbert's humiliation did not go down well with King John, who summoned him to his Christmas Court. A demand that Gilbert de Clare and his allies choose to ignore. Instead, Gilbert strengthened his local position. Abbot Peter was 'removed' from Hailes Abbey, and he thought it advisable to search for his soul by pilgrimage to the Holy Land. Gilbert joined the great revolt against John's rule, and in  1215, Gilbert became one of the council of twenty-five lords and barons who acted as sureties for the Magna Carta. The Charta also felt with Engelard de Cigogné. Clause 50 Engelard de Cigogné was banished from the Kingdom, and his lands were confiscated.  Gilbert's revenge?

Some Thoughts


The campaign was an enjoyable set of three games I played over several months. During this period, the main protagonist began to develop their own characters. Engelard de Cigogné was a man on the make who was sensitive of his own honour. This made him take risks, like demanding a duel with Gilbert, and this hotheaded personality impacted how I played him in the later games. Gilbert was the opposite. Born into one of the great families, he had little to prove, but he, too, was conscious of his family's honour. However, his approach was cool and tactical - a remote personality but tactically acute. One of the great joys of a campaign is how the main protagonists develop in your mind, making solo play easier. 

Sunday, 8 January 2023

Workbench 2023

This blog is self-indulgent; it is just a list of the projects I hope to complete in 2023. However, it might give the reader inspiration or ideas for their games. Like most wargamers, I have long project lists, which I am always willing to add despite their minimal chances of reaching the table.

My Campaigns

My first group are those projects I started in 2022 and need to continue or complete. Overall, in 2022 I was better at getting games to the table and averaged about two games a month. I also started two campaigns. The first is a Fantastic Battles campaign, using my own campaign rules to fight the 2nd Shadow Wars. In 2023 I need to continue to develop the rules and move to the next campaign year as an Umbarji (Orc) civil war begins to brew. The second is my Pulp Alley campaign, Tomb of the Serpent, which has now moved to Cario as the heroes try to stop the ancient Egyptian god, Apophis. 

Strength & Honour and Lion Rampant

The other two ‘banker’ games are Strength & Honour and Lion Rampant. For the former, 2023 is the year of the phalanx, as I see how the rules deal with these hedgehogs of the ancient world. Initially, the focus was on Rome’s wars against Mithradates, but the aim was to run a 1st Punic War or Hellenistic campaign. Hopefully, Mark Backhouse will have completed his early Roman supplement to the game and coupled with my research; the campaign will be ready to play in 2024. For Lion Rampart, the first objective is to play the last battle of my Feud campaign before moving eastwards to play something from the Early Medieval period, including the twelfth-century Latin East (Outremer).

Two other projects are centred around games that use the Lion Rampart framework. The first employs the ‘The Men Who Would be King’ (TMWWBK) rules, where the idea is to follow the campaigns of Neil’s Blue Caps (The 1st Madras Fusiliers) during the Indian Mutiny/Rebellion. Most of the preparation has been done, so I should be able to play the first game in 2023. The second is to use the 'Xenos Rampant' game to fight an alternative WWII setting, where Dad’s Army takes on Cthulhu-led Third Reich. This is planned for the last quarter of my painting schedule goes to plan.

God’s Scale 2mm.

The next group of projects centres around the 2mm and can be briefly but inaccurately described as Black Powder games. I recently played the Napoleonic corp-level game, Blucher, using card markers, which I found very enjoyable. I am looking at some other divisional/operational rules, and the plan is to play several Peninsula War battles at both the corp (battle) and divisional levels. The first battle on the list is Vimeiro (1808). The second element of the 2mm adventure is the English Civil War and other conflicts from the seventeenth and early eighteenth centuries. I will use the Twilight Rules (Divine Right and the Sun King). The first game will be the Battle of Cheriton (1644), followed by Edgehill (1642). I am also reading about other battles of this era and may try something from the Thirty Years' War or the Great Northern War. One of the Twilight rules is that they are well served with historical battle scenarios.

Naval Wargaming

Naval wargaming is the third main area and a genre often ignored by landlubbers. I plan to use small scales to refight some classic naval actions. The adventure starts with the Age of Sail, with a refight of small engagements after Trafalgar, Cape Ortegal (1805). Ecnomus (256 BCE) will be the ancient venture which will link into my preparations for a1st Punic War or Hellenistic campaign. Last on the list is Cape Matapan (1941) from WWII, a period I have never played before. For each period, the starting point is the rules by Long Face Games.

Workbench

The last area is my workbench, where I have several skirmish games. This range from swashbuckling rules, ‘Flashing Steel’ to the Superhero genre employing Four Color Studios rules. I also want to try out 7TV rules and scenarios because of the excellent narrative element. The last pile on the list is some old Kickstarter board games I need to play or sell. What's familiar about all the games on the workbench, they involve a small number of figures and terrain, which I already have in my collection.
The Brown Book Initiative
Brown Books


Brown Books!

I love to write down ideas and how my thinking on a game develops. This motivates the blog, but I wanted something more spontaneous. So I bought some cheap brown notebooks and labelled them for each project under development. Each book will have my thoughts on the scale, rules, some research and how I plan a game or campaign. These will feed into this blog here, so there is more of a narrative between blogs.
Closing Remarks

Well, it's longer than I thought, and I have bitten off too much, but isn't that what all wargamers do? To this list, I have to add the new shiny rules and figures that appear in 2023, which will distract me in new directions. Already, I heard that the Two Fat Lardies are publishing a western gunslinger skirmish game; now that is a setting I have not tried!

Enjoy your gaming.

Monday, 7 November 2022

The Feud - Part 2

This is the second wargame in my ‘Feud’ campaign, between Gilbert de Clare and King John's High Sherriff, Engelard de Cigogné. The first battle report is where Gilbert ambushed Englelard and his local ally Abbot Peter on Evesham Road. I used Lion Rampart, 2nd Edition, for this battle to see how these rules played. Each side had 24 points. As usual, I played this game solo. I used Adjunct Introuvable to generate the deployment and orders for Englelard’s forces. Although Nic Birt designed them with battles in mind, they worked well in this skirmish. Now onto the backstory.


Raiding, Burning and Pillaging

After his successful ambush on Evesham Road, Gilbert de Clare continued his feud with Engelard 
and Abbot Peter, and throughout 1210 both sides raided each other's lands. Winter finally ended the crop burning and pillaging, but in spring, hostilities restarted when Gilbert attacked Abbey’s farmsteads near Didbrook. These attacks finally drew Engelard into a hasty battle in the wooded area south of the village.

Opening Moves.

Engelard adopted a cautious strategy that would allow him maximum flexibility, to entice Gilbert from the high ground before delivering a killer blow with his best men, whom he held in reserve. De Clare saw the ragtag forces arrayed against him from his advantage point on the ridge, the local levy and some monks. He took advantage of the circumstances and ordered a general advance across his battlefront. He kept himself and his knights as a mobile reserve to deliver a killing blow.

Three melees developed. On de Clare's right flank, his sergeant had moved across the wheat field to be met by a hail of arrows from the neighbouring enclosure. In the middle of the battlefield, Gilbert’s foresters moved slowly through Staites Wood to be encountered by the Abbot's men, hoping to use the dense wood to neutralise the enemy’s attack. On the left, Gilbert’s crossbowmen had seized the farm on the eastern end of Staites Wood farm. Where they conducted a historical resistance against Engelard’s spearmen, supported by the local levy, who were trying to turn Gilbert's weaker left flank.

De Clare's Crossbowmen valiant defence

 
De Clare's crossbowmen hold Wood farm against all comers[/caption]

The Battle Heats Up.

Seeing his crossbowman successfully holding the Sheriff's advance, Gilbert committed his mounted sergeant into the fray. They charged the spearman and forced them back without doing much damage. The sergeants' attack was the moment Engelard had anticipated because Clare had over-extended his battle line. Leading his knights, he suddenly appeared before Wood Farm and crashed into de Clare’s mounted sergeants, cutting them to pieces.


Engelard Slaughters de Clare's Sergeants

Engelard slaughters de Clare sergeants.[/caption]

The Challenge


Witnessing his hated rival's charge, De Clare committed himself and his knights to the fray. Engelard noticing he was now at a disadvantage, challenged de Clare to a due of honourl to improve the odds. Something Gilbert was too shrewd to accept. Thankfully for Gilbert, his men agreed, and the loss of honour had no impact on his men's morale, and fighting continued uninterrupted.
Guilbert‘s knights now engaged Engelard and his close retainers, forcing them to flee the field after several rounds of fierce combat.

De Clare's Charge

 
De Clare charges Engelard's knights, after refusing a challenge.[/caption]

All is Lost

Seeing their commander in flight, Englelatd's levy decided to scamper to safety. Gaps appeared throughout Engelard's battleline, with many of the Sherriff’s foot retainers becoming isolated and lacking support began to flee, abandoning their comrades to Gilberts and his knights.

Saturday, 7 May 2022

The Feud

This wargame had a long gestation period. It took three Kickstarters plus many hours of painting before I have managed to get Baron’s War to the table. Barons War is a medieval skirmish game set in the thirteenth century.  The game was initially launched on Kickstarter in 2019 with figures for the Barons revolt against King John. Since then, further Kickstaters have followed, including several campaigns. Overall, the game is well supported and has supplements for the late Saxons, Vikings, the Norman Conquest, and the Crusades in Outremer.

A range of figures is also available through Footsore Miniatures. The miniatures paint up well, but like any medieval project takes a while to paint. This is my excuse for taking nearly two years to set up a game. The good news is the game can be played with about 25 figures aside, although a more significant skirmish can be fought as your retinues grow.


Skirmish on the Evesham Road.

Like all my games, there has to be a  strong narrative, so here is the backstory to the game. One aspect of the game I like is the campaign rules allow you, the players, to generate a grievance between the two warring barons and the flashpoint that ignited the armed hostilities. My campaign is set before Magna Carta and is loosely based on the campaign supplement, The Most Ignoble Feud. Therefore, this scenario will be the first of three games in the mini-campaign.  I also plan to use this storyline to test different rules and my ideas. 


Rivals in the West Country

The period witnessed John favouring baron families from outside his English realm. One of these was  Gérard d'Athée, a trusted lieutenant of King John, who had served him in France and later as a High Sheriff in England. Gerald was joined by one of his relatives Engelard, one of the protagonists of our story, whom John had appointed High Sheriff of both Gloucestershire and Herefordshire in 1210. The rapid rise of these men caused resentment amongst the English baronage, including the de Cares, a powerful family. The father, Richard de Clare, was Earl of Hereford and his son, Gilbert, had inherited the earldom of Gloucestershire from his mother. It is Gilbert, the son, who is our other feuding baron.


de Clare Coat of Arms


Monastery at Haines

Engelard's attempt to found a monastery at Hailes, at the centre of the de Clare’s holdings, sparked our fictional feud. Gilbert considered this one transgression too far and decided to ambush Engeland and his monks on the way to Hailes on the Evesham road.


Evesham Road


The Ambush

In preparation for his attack, Gilbert had blocked the road with several carts and tree trunks, forcing the battle into the narrow area between the wood to the south and the hills to the north. He hoped his superiority in mounted knights would be most effective in this narrow killing ground. On hearing from his scouts that the road was blocked, Engelard deployed his experienced archers and foot sergeants on either side of the road to try to turn the barricade. His smaller mounted contingent would be used to exploit any weakness.

At first, Engelard's plan bore fruit; his archers, supported by some militant monks, pushed Gilbert's crossbowmen back from the small farm and started to move into the forest. If they could expel the de Clare's crossbowmen, they could be able to shoot onto the flanks of men manning the barricade. Englelard's men had yet to make progress on the road but had pinned down the rest of Gilbert's infantry. At this point, Englelard decided to commit himself and his mount troops to attack the open land between the road and the hilly area. This was the moment Gilbert had been waiting for, and he committed his mounted knight. The knight quickly crushed Engelard's mounted sergeants and attacked Englelard and his knightly bodyguard. Outnumbered and taking casualties, Engelard fled to seek his revenge on another day.


De Clare's Knight await their moment

De Clare attacks


The Rules and the Game

Overall, I liked the rules, and I thought I had a great feel and produced an exciting weekend game. My one criticism is that I found the rules difficult to reference, despite QRS (Quick Reference Sheet), but this is probably true of any new set of rules. I plan to continue Engelard's and Gilbert's feud with a significant battle when Englelard seeks revenge for the dishonour inflicted on the Evesham road. However, the next episode will be played with Lion Rampart rules, so I can compare. 


The Story Continues

The story of Engelard's and Gibert's feud continues here.


Links

Warhost is the home of Baron's Warand includes articles and a retinue builder.

Barons War Facebook Group. A discussion group with many great photos for inspiration, army lists and downloads.

Blood Cries Afar, well research but readable book on the 1st Barons War. Great for inspiration and ideas.

Enter the Leopard – Swashbuckling in the English Civil War

Meet Edward Clement, better known as the Leopard – spy, adventurer, diplomat… and perhaps a forgotten pretender to the English crown. He is ...